Hello Reader.
It’s nearly laundry day at my house. Good old laundry day.
Despite the rhyme’s insistence that “Monday’s the washing, Tuesday’s the ironing, everybody’s happy, well I should say”, my laundry day is neither on Mondays, nor do I take great pleasure in it. It’s expensive, repetitive, awkward work, and sometimes has disastrous results (hello, red sock in the what-was-once-white-load).
But I didn’t come here just to complain. I came to bring tidings of great joy. There are ways to making laundry less painful. Get ready, Reader. It’s going to be a bumpy ride.
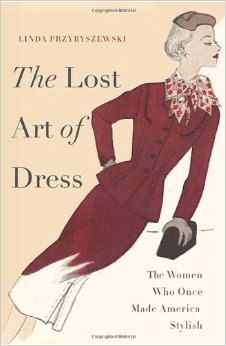
Firstly, you should know that most of these ideas come from two people. The first is a lady called Linda Przybyszewski, who wrote an excellent historical account/manifesto/call-to-arms/lament called The Lost Art of Dress. In it, she details the rise and fall of home economics in America, with lots of lovely pictures, sassy commentary, and helpful hints about how women of the past dealt with keeping squeaky clean. The second lady is my mother. I’m convinced that she knows everything. By the end of this, you likely will be convinced, too.
Now, Reader, some of these ideas might strike you as a little strange. Stay with me. There is method to the madness, but you have to stick it out.
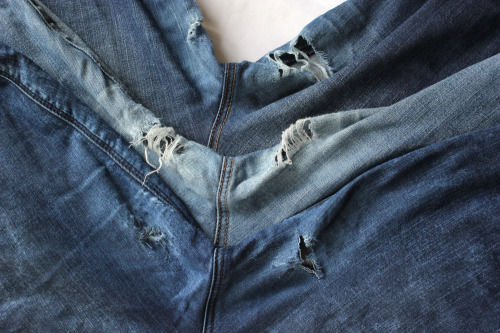
1. Don’t wash your clothes. Okay, so you’re probably thinking to yourself, “She’s already jumped the shark”, but hear me out. We have a tendency,at the end of a long day, to throw everything we are wearing into the laundry hamper and call it a night. As tempting as this is, you may be doing more harm than help. Instead, washing only those clothes that are truly dirty (i.e. socks/pantyhose, underwear, undershirts and possibly bras), and hanging your pants, dress, shirt, skirt, sweater and other outer garments up does two wonderful things. The first is that it lessens the amount of laundry you do each week. It also keeps your outer wear in better shape. Washing even the sturdiest fabrics too much can cause the fibres to break down, which will result in faded, thin, worn fabrics. This process is only accelerated with more delicate materials.
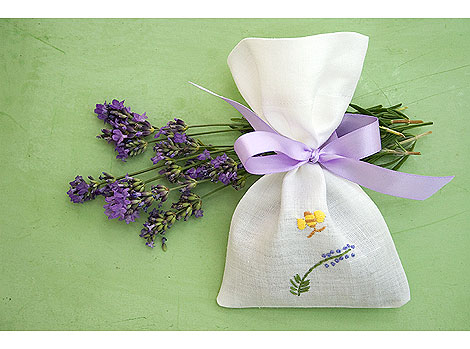
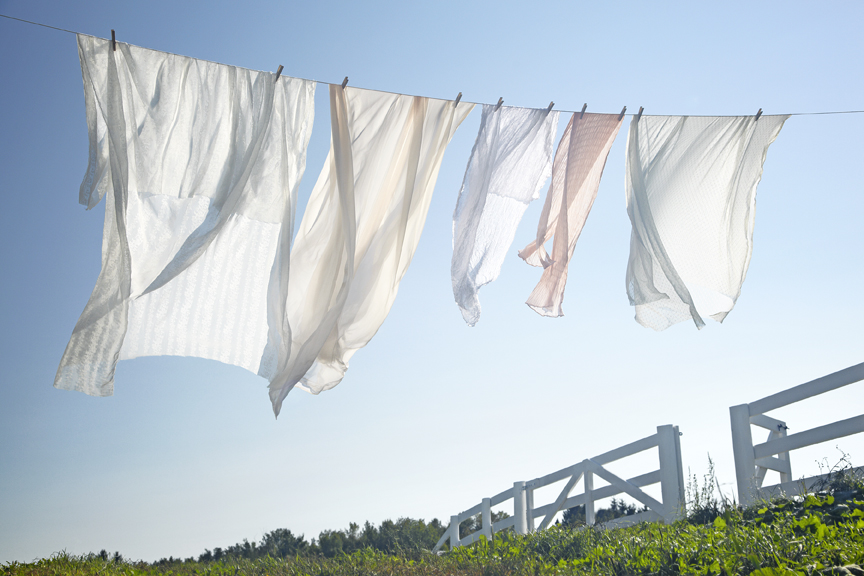
2. Hang everything the minute it comes off your bod. I am terribly guilty of breaking this rule, but if you hang your clothes instead of letting gravity do the work, you won’t have to wash or iron as frequently, because your clothes won’t be wrinkled and dusty from time on the floor. There are also ways to up the ante when you hang your clothes. Textile sprays and refreshers are easy to use, but can be pricey, and sometime the scents and perfumes bother sensitive noses. Another option is to hang clothes outside. Lovely ladies of yesteryear hung their clothes in “airing cupboards”, which were fancy wardrobes, full of vents and little sachets of lavender, which would freshen up clothes and give them a pleasant floral aroma. Most of us do not have airing cupboards, but similar effects can be achieved by hanging clothes outside in pleasant weather, where the sun can work its magic on whites, or in doors in a storm. (My personal favourite spot is the bathroom, but if you have a laundry room, that works too.) Little sachets of herbs like lavender are still a great way to keep fabrics smelling fresh, whether you use them in a linen closet, or for just-worn clothes. An easy-to-come-by alternative is the dryer sheet: tuck it between bedsheets, towels, drawers, or attach to clothes hangers for laundry fresh-scent without the laundry. Weirdly, placing clothes in the freezer is an effective way to eliminate odours without washing: this method is excellent for that dry-clean-only blouse or jacket that still smells like the cedar chest from whence it came, or that cute but musty second-hand skirt.

A lavender sachet
3. Steam is your friend. Hanging up clothes in the bathroom during or after a shower can help reduce stubborn wrinkles if you don’t have time for the full iron. Also, if you happen to have a straight iron, you can heat that baby up and use it to tame wrinkly shirt collars in a pinch, but be sure not to set it too high, especially if you are dealing with any synthetic fabrics. Too much heat will get rid of your wrinkles, but also melt your shirt. Not ideal.
4. Don’t put everything in the dryer. Dryers can be fast and effective at getting rid of moisture in fabric, (that’s their job), but they also have some negative side effects.They are notoriously unfriendly to the environment, producing all kinds of nasty green-house gases (older models are especially guilty of this.) One of the worst things about them, old or new, is their impact on certain types of fibres. Wool, silk, and many synthetics don’t play nicely with dryers. They shrink, warp, and in some cases, melt. Towels and bedsheets get along great in a dryer, but generally speaking, you can get away with hanging basically everything else. Hanging things to dry means never having to worry about shrinking your favourite sweater, or new pair of jeans. It means extending the life of your delicates and undergarments. It means clothes that smell like sunshine, without breaking the bank. And don’t we all need more (metaphorical) sunshine in our lives?

So pretty!
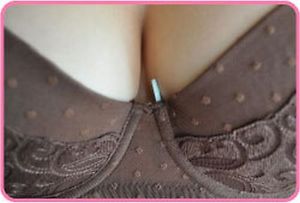
5.Speaking of delicates… Wash. Them. By. Hand. Now, when I say delicates, what I mean is bras and hosiery, but also sometimes workout gear and specialised garments. Basically, if it goes next to your skin, or your delicate bits, it is itself a delicate, and needs special attention, a nap schedule, and to be sung to sleep. (I’m kidding. Only sing to your underpants if you want.) Washing your lacy panties, bras, and pantyhose in the bathroom sink with a gentle detergent (baby soap is a great option) works beautifully. It prevents the elastic from heating and cooling too quickly. It also keeps your unmentionables from stretching. Best of all, it can keep your underwires, should you have them, where they belong: snug as a bug in the fabric of your bra, and NOT stabbing you in the rib-cage during that really important meeting. Wash and rinse them gently, and then lay them flat to dry on a towel draped flat over a clothes horse, or on any flat surface. Flat is key. Did I mention flat? Also, bras require a wash every two-to-three wears, so you don’t have to handwash constantly. Happy day!
Waiting for its next victim.
6. Dealing with sweat. Look, guys. We all sweat. It’s a thing. We have to be okay with it. Unfortunately, our clothes do not. Human sweat is acidic, and that means that when it hangs out on your clothes, it denatures fibres, which is a fancy way of saying it sort of eats them. It also stains them. This is a problem. Human beings are going to sweat, and we’re not likely to stop wearing clothes any time soon, so we’ve got to figure out ways to combat sweat damage to our garments. Many deodorant and antiperspirant products promise to prevent sweat stains, but they are not always as effective as they claim, and many folks don’t much care for coating their pores with aluminium daily, so that’s often not the best option. Here is one instance where looking to the past can help us out in the future. Smarty-pants from days of old, before antiperspirant existed, made little crescent-moon-shaped pads out of cotton and batten (stuffing), which they then sewed into the underarms of their shirts and blouses. The little pads soaked up all manner of sweat, leaving clothes stain-free. At night, as they hung up their sweat-free clothes in their airing cupboards, these same geniuses simply took out the stitches holding the little pads in place, whereupon they could wash and dry them to be ready for another use. People had several pairs of these little pad bad boys, so they could wear a fresh pair daily. “But I don’t know how to sew, and some of my clothes don’t have sleeves!” I hear you cry, disheartened. Never fear, Reader. An alternative to the pad solution is to rinse the garments that you’ve sweated on throughout the day (most likely to be shirts and undershirts) and let them dry. This will wash away the worst of the sweat before it has time to hang out and get all acidic up in your clothes. If you’re looking for extra power, I’ve had good luck adding dish-drying liquid (the kind you put in a dish washer to help your dishes dry shiny and completely.) I’ve only tested it on white shirts, so be careful using it on coloured clothes.
7. Out, out, damned spot. Actually, generally speaking, rinsing out stains as soon as possible is usually a pretty good idea. Most natural fabrics (silk is sometimes excluded here) can get wet as long as you let them air dry. If you get barbeque, blueberries, or blood on your otherwise pristine white shirt, get thee straight to a can of soda water. Pour the water on the reverse side of the stain, and blot. Never, never never (never!) scrub. Unless you want the stain to get bigger, and more deeply entrenched in the fibres. Then, by all means, scrub away. Vinegar and baking soda can work well to lift stains out of fabrics, but be sure to rinse out the vinegar: it is acidic, and any residue can stain your clothes itself.

Bubbles at work to save the day!
8. A Wrinkle in Time. Let’s say you’ve washed your clothes and hung them to dry, or are pulling your towels-and-sheets only load from the dryer. To keep your clothes from getting really wrinkled, fold them as soon as possible. You can usually get away with not ironing a lot of stuff if you fold it carefully the first time, and then zip it straight into its waiting drawer. I’m looking at you, socks, tee shirts, shorts, dish towels, and cotton undies.
9. Oh, sheet. Bed sheets are a pain. I’m still trying to figure out how to properly fold a fitted bed sheet, but here’s a handy tip. To keep all the pillow cases and sheets together, fold up everything except one pillow case, the way you normally would. Then slip that pretty pile of linens inside the pillow case. Voilá. You have a tidy, docile little pouch of bed-sheet goodness, ready to lie obediently in your linen closet, instead of getting all mixed up and bunched into a wad at the back of the shelf.
10. Seasons in the sun. If you happen to live in a climate which demands a wardrobe for each season, washing your clothes before you put them away can help to combat that musty smell when you take them out again, as can a judiciously placed dryer sheet or lavender sachet. It also keeps acidic stains from damaging your clothes over long periods of time. To get rid of the smell of mothballs (yuck!) or cedar, should you desire it, a quick trip to the outdoor clothes line or the freezer should do the trick.
I hope you found these ideas helpful, Reader. If you’re keen for more info on the laundry ladies or Dress Doctors of old, check out The Lost Art of Dress, and prepare to get inspired.

Do you have any tips you have found helpful in the battle against endless laundry? Leave a comment below! I’d love to hear from you!
Yours,
Cotton Jenny